Tutorial Tap-X Standalone
Tap-X Standalone
How to initialize a lock
Initializing a lock means becoming the Master of an unassigned lock.
An unassigned lock is a new or reset device that has not yet been registered by another user.
To initialize a lock, make sure Bluetooth is enabled on your smartphone.
Press the button located on the back of the lock, opposite the Rielda logo. The lock will start flashing blue.
From this moment, you have 5 minutes to initialize the device:
- Open the app
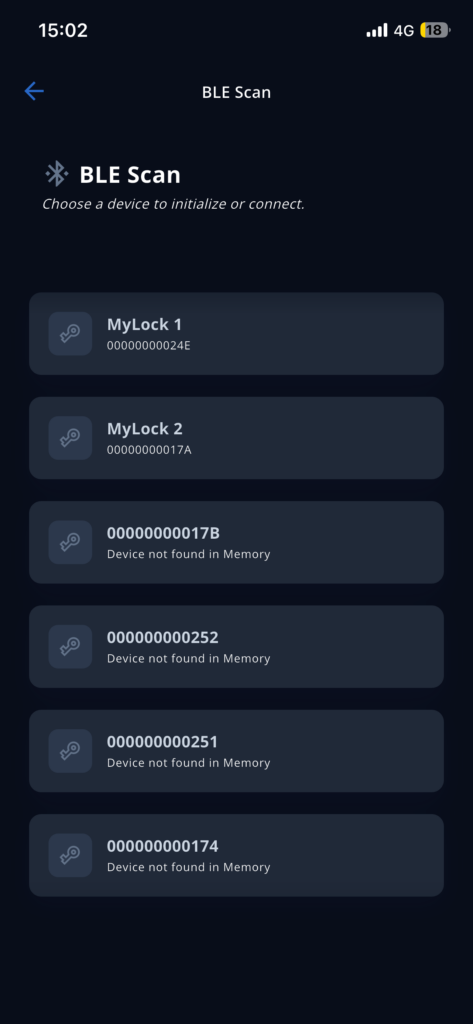
- From the Home screen, tap Scan Devices
A list of nearby devices will appear:
- Select the lock you want to initialize
The selected lock will flash blue:
- Enter a name for the device
- Tap Initialize
The lock will flash green and will appear on the Home screen.
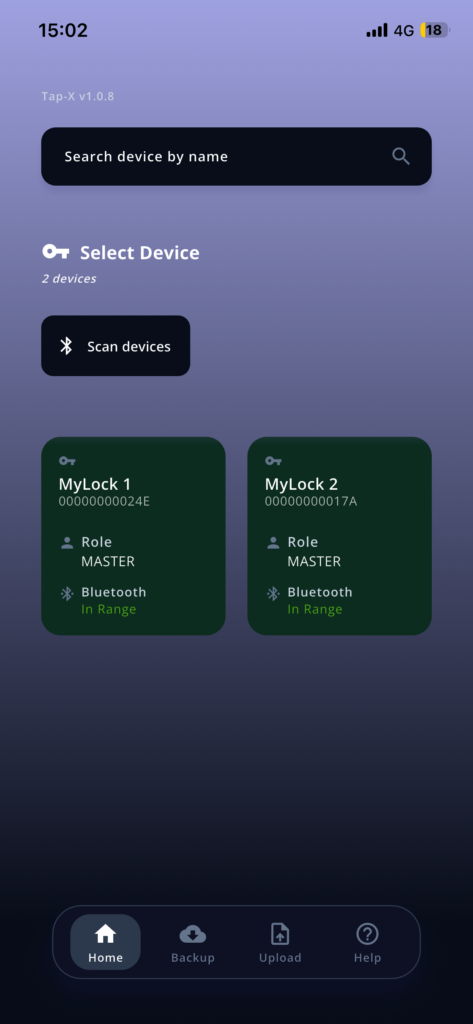
Your role will automatically be set as Master.
On the Home screen, you will now see:
- Lock name
- User role
- Bluetooth status
How to activate the lock
Activation refers to both unlocking and locking operations.
Make sure Bluetooth is enabled on your smartphone:
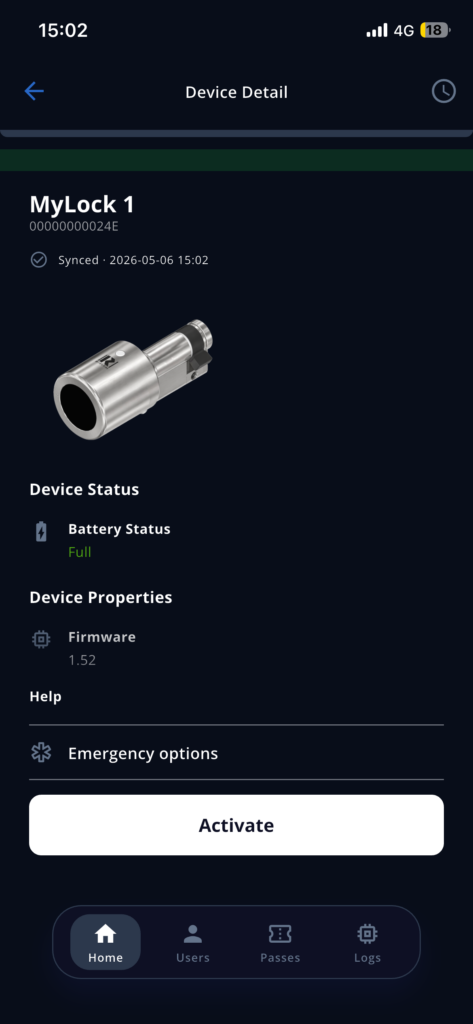
- Select the lock from the Home screen
- Tap Activate
Green LED: the lock can now be turned.
After 15 seconds:
Red LED: the lock returns to inactive mode.
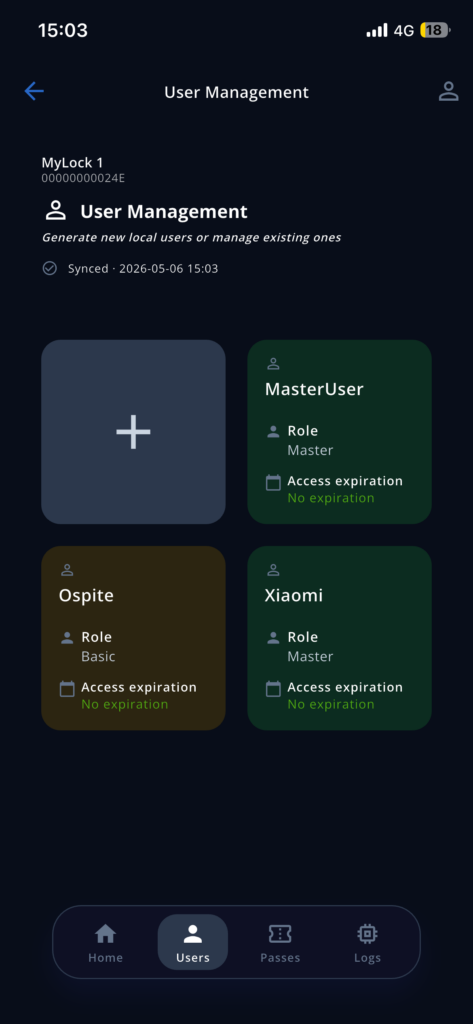
Available roles
Master
The Master has full access privileges. They can:
- Add and remove users
- View access logs
The Master who initialized the lock cannot be removed by other Master users.
Basic
The Basic user:
- Cannot add or remove users
- Cannot view access logs
Basic user access can include a time expiration set by the Master who added them.
Emergency options
After selecting a device from the Home screen, the Emergency Options button will be available.
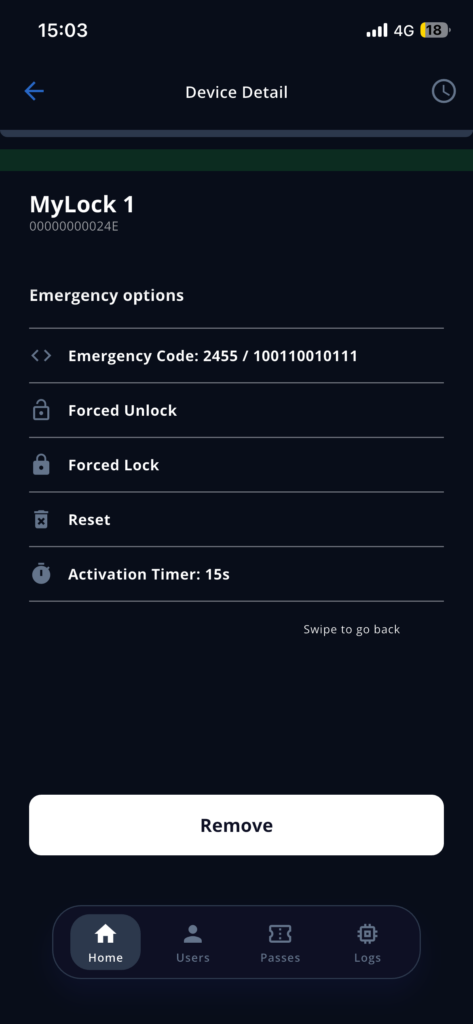
There are 5 emergency options:
- Emergency Code
- Forced Unlock
- Forced Lock
- Reset
- Activation Timer
Emergency Code
The Emergency Code allows the lock to operate without a smartphone.
Activation is performed using the button located on the back of the lock, opposite the Rielda logo.
To register an Emergency Code:
- Tap Emergency Code on your smartphone
- Enter a numeric code (number greater than 256; decimal format allowed)
- Tap Dec to display the code in binary format (0 and 1)
To activate the lock without a smartphone, you must enter the binary code.
The decimal format is useful for recovering the binary code if forgotten.
- Tap Save
To activate the device using the Emergency Code:
- Press and hold the small button
The lock will flash blue, indicating that the code can be entered.
- Enter the binary code using the emergency button
Press and hold to enter number 1 (green light on the device).
Press quickly to enter number 0 (red light on the device).
Wait 5 seconds after entering the last number. The lock will flash blue to indicate the end of the input sequence. Then it will flash green and activate.
If you make a mistake during input, simply wait for the blue light and start over.
Forced Unlock (Emergency Use Only)
Allows the lock to unlock in case it becomes permanently locked.
- Can only be used twice consecutively
- After using Forced Unlock, use the normal Activate function
Forced Lock (Emergency Use Only)
Allows the lock to lock in case it becomes permanently unlocked.
- Can only be used twice consecutively
- After using Forced Lock, use the normal Activate function
Activation Timer
Allows you to set how long the lock remains active.
Default time: 15 seconds.
How to authorize a user in person
To grant access to a device, you must be the Master of the device.
You and the user must both be near the lock.
Make sure Bluetooth is enabled on your smartphone:
- Select the lock from the Home screen
- Tap Users
- Tap +
- Enter a name
- Select a role (Master or Basic)
- Tap Save
The connection closes and the app displays the message: User added.
- Press OK to continue
On the other user’s smartphone:
- Open the app
- Tap Scan
- Select the lock
- Tap Get
The displayed role will initially appear as Basic until the first connection. It will automatically update to Master if authorized as such.
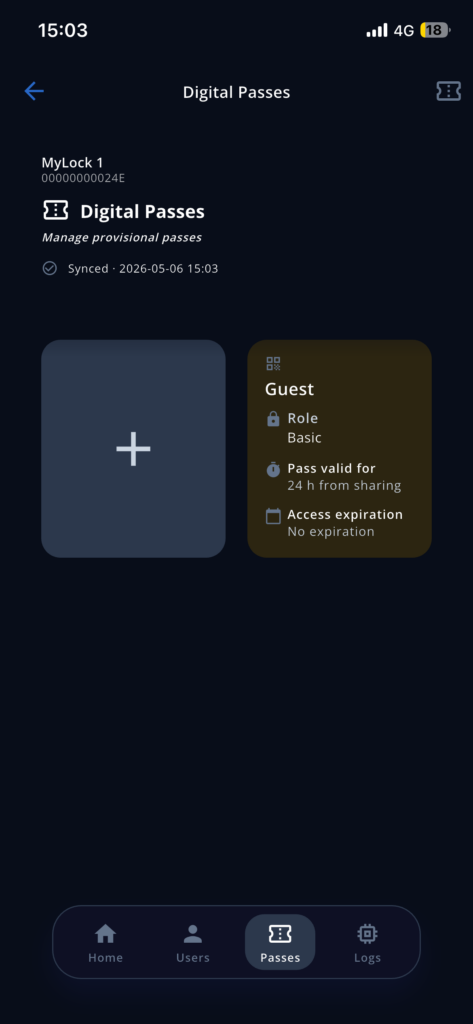
How to authorize a user remotely
To grant remote access to a device, you must be the Master of the device.
You can generate a QR-code-based pass that the user must activate within 24 hours by connecting to the lock.
After 24 hours, the user will no longer be able to register the device.
How to Generate a Pass
Make sure Bluetooth is enabled on your smartphone:
- Select the lock from the Home screen
- Tap Pass
- Tap +
- Enter a name
- Select a role (Master or Basic)
- Set an expiration date (Basic users only)
Master users have no time limitations, while Basic users can have an expiration period starting from their first connection to the lock.
- Tap Save
How to Send a Pass
- Select the previously generated Pass
- Tap Share
- Set a password (minimum 8 characters)
- Tap Share Pass
- Tap Share
- Send the QR code via email or messaging apps
- Communicate the password separately to the authorized user
How to use a received pass
Approach the lock and make sure Bluetooth is enabled on your smartphone.
- Tap Upload
Two methods are available:
Scan the received QR code
- Tap Upload QR Pass
- Use your camera to scan the QR code
- Enter the password received from the Master
- Tap Confirm
Access activated.
Load from gallery or files
- Tap Upload QR Pass
- Select the QR code from your image gallery or files
- Enter the password received from the Master
- Tap Confirm
Access activated.
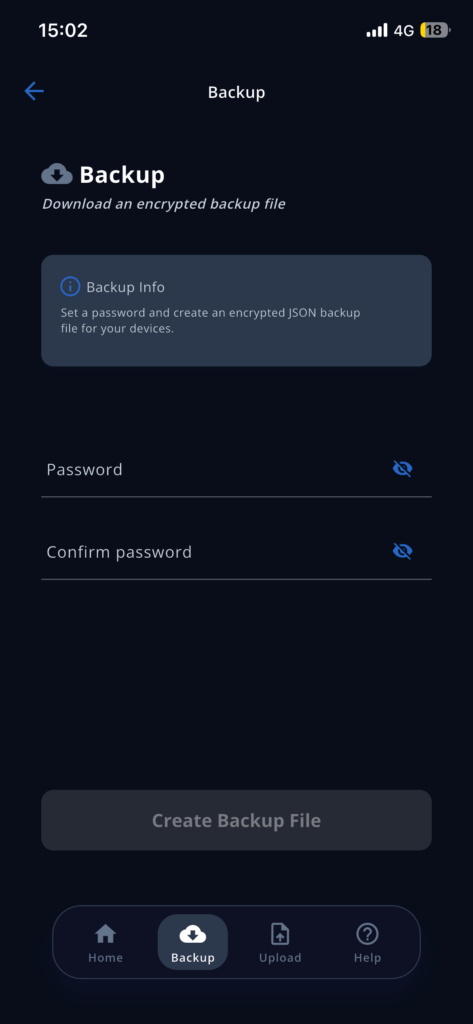
Backup
The Backup function allows you to save access to all devices for which you are Master using a JSON file.
How to Generate a Backup
- Tap Backup
- Set a password (minimum 8 characters)
- Tap Create Backup File
- Tap Save Backup File
The file will be saved on your device.
How to Restore Access to Your Devices
- Tap Upload
- Tap Upload Backup File
- Select the backup file
- Enter the password you previously set
- Tap Confirm
Restore completed.
How to authorize a user on all your devices
To authorize a user on all devices where you are Master, you can share your backup file.
Sharing the backup file does not remove or modify your own device access.
- Tap Backup
- Generate the backup file as described above
- Share the file with the user
The user will need to upload the backup file and enter the password.
How to check access logs
Access log monitoring is available only for Master users.
- Select a lock from the Home screen
- Tap Log
You can view:
- Access events
- Unlock events
- Lock events
