FAQ - Functional Specifications
Tap-X Enterprise
Splash e Home
This section helps you understand how devices are displayed and organized within the app. Here you can learn how to locate a device, interpret its status, and navigate the various available screens.
Device scanning
This section helps you understand how devices are displayed and organized within the app. Here you can learn how to locate a device, interpret its status, and navigate the various available screens..
Device initialization
Initialization is the first step in setting up a new device and making it operational in the system. Here you’ll find all the information you need to successfully complete this phase.
Device management
Once configured, the device can be managed directly from the app. This section explains how to connect and use the main features during an operating session.
Device detail
How can I view available information about my devices?
Offiline mode
The app can also work without an internet connection in some situations. Find out here when you can use offline mode and what operations are permitted.
Connecting to the device
Once configured, the device can be managed directly from the app. This section explains how to connect and use the main features during an operating session.
Operating options
After connecting to a device, you can perform various operational actions. This section describes the main available functions and their behavior.
Emergency options
Emergency options are intended for cases where the device does not function as expected.
Profile and preferences
Each user can manage their own profile and customize their app experience. Here you’ll find information about available settings and account management.
Error codes
Some information, such as emergency codes, is sensitive and protected. This section provides instructions on how to view and use it correctly and safely.
Conclusion and FAQ
Some information, such as emergency codes, is sensitive and protected. This section provides instructions on how to view and use it correctly and safely.
Splash e Home
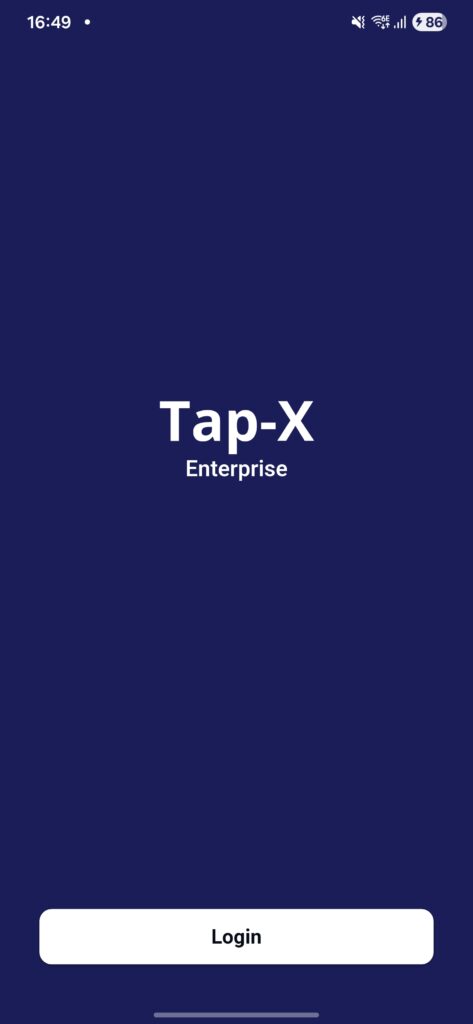
Splash
The Splash screen is the first screen displayed every time the app is opened or after logout. Its purpose is to prepare
the app and keep the user waiting while providing visual feedback. If no session exists or the existing session is no
longer valid, it allows the user to log in; otherwise, it proceeds to recover a previously interrupted session.
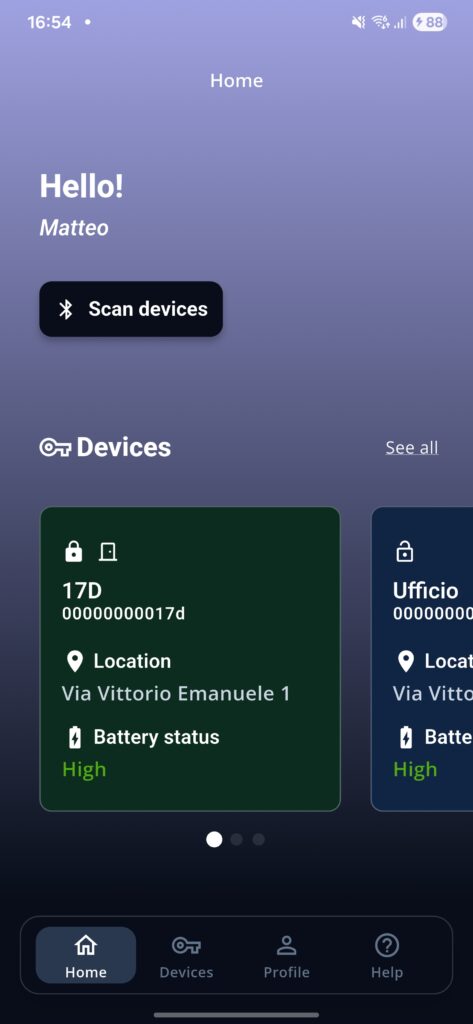
Home
The Home screen is the main screen displayed after every login. It is not the complete device fleet management screen.
It contains a few quick references, such as the first 10 devices assigned to the user and the command to go to the Device Scanning section.
On the Home screen, it is not possible to select more than one device at the same time.
Device Scanning
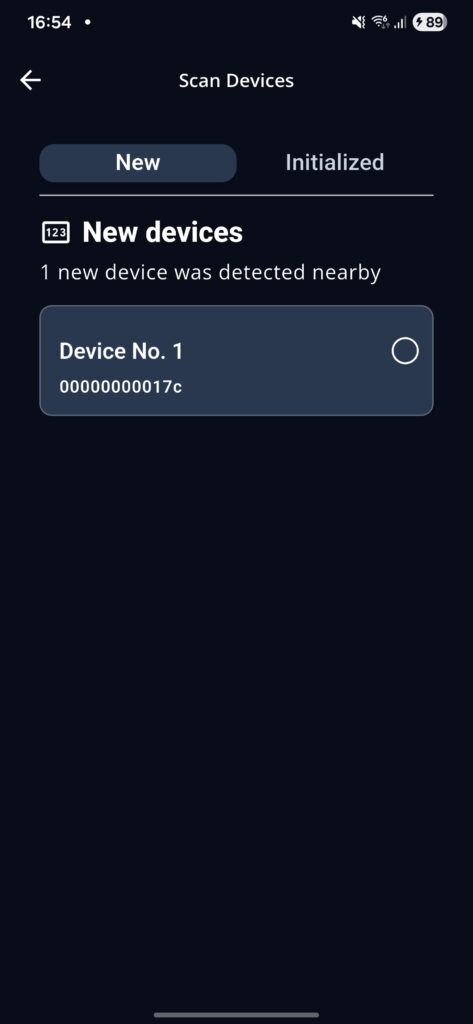
A scan is performed to detect nearby devices that can be connected to.
For MASTER users, two sections are available: New (nearby devices that have not yet been initialized) and Initialized (devices already present in the system and assigned to the user by the administrator). If a device does not appear in either of the two pages, it means that it has not been assigned to the user or that it is not reachable.
For BASIC users, only the previously mentioned Initialized section is available, displayed as a single screen.
New section
Nearby devices that are not present in the system and are detected through scanning will appear here so that they can be initialized. Only one device can be initialized at a time. An internet connection is required to perform initialization.
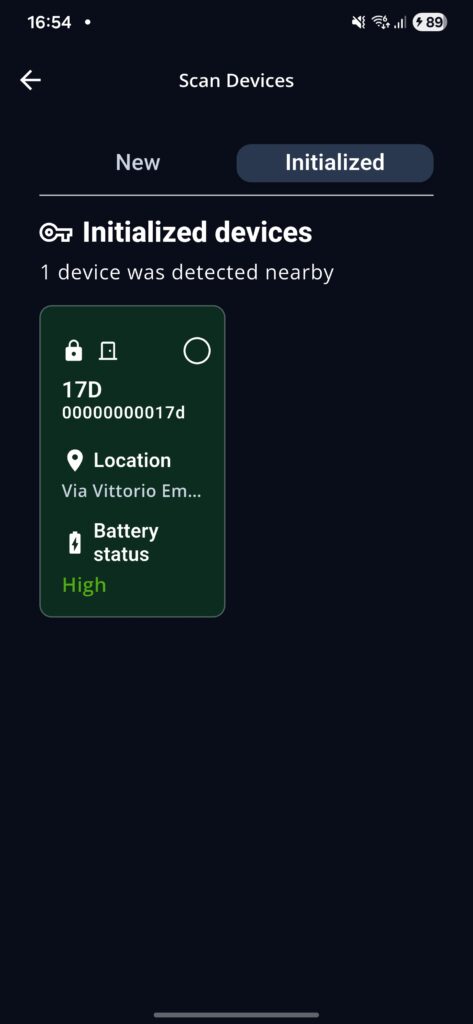
Initialized section
As with the global Devices screen, this screen allows the user to view a brief device preview, access its details, and make a single or multiple selection before connecting.
Device Initialization
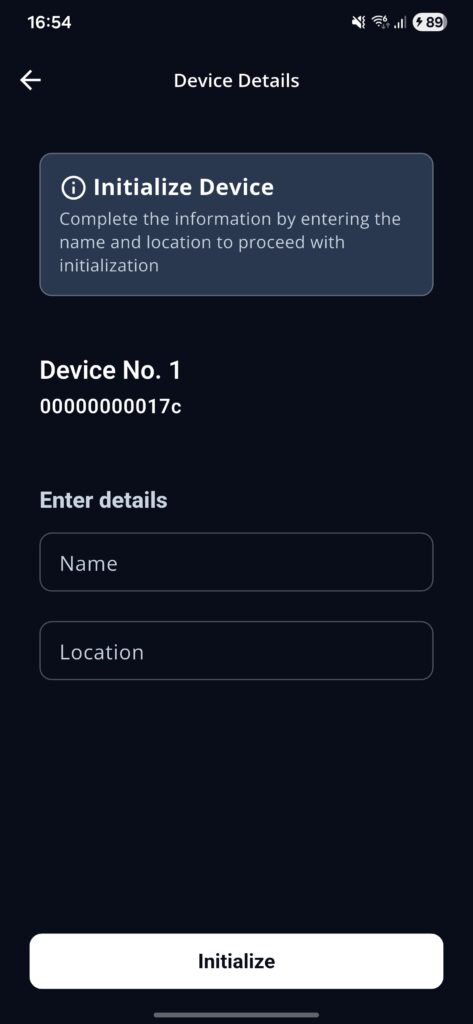
This screen can only be reached from the Device Scanning section.
Once a non-initialized device has been selected, the user is asked to enter the name and the location where the device is to be placed. The GPS position is also requested in order to save the device location geographically.
After confirmation, the initialization process starts. The device will flash blue five times to indicate that initialization is
in progress. At the end of the process, it will show a green or red light depending on the result of the operation: green
means everything is OK; red means that a problem occurred. In case of an error, an error code is provided. In case
of problems, provide this code to support.
Device Management
This section includes all devices, including those that are not nearby, assigned to the user by the administrator. In addition to viewing them, from this section the user can select devices, access their details, and search for them using the dedicated search button located at the top right.
Selecting one or more devices
Devices can be selected by using the dedicated round selector or by pressing and holding the device to be selected.
In addition to haptic feedback, a message will always appear at the top of the screen to notify the user of the selection. After a multiple selection, the dedicated “Select” button will appear to confirm it.
By tapping directly on the device or by confirming a multiple selection, the user accesses the Device Detail(s) screen.

Device Detail
This screen can be accessed after a single or multiple selection from different points in the app: Device Scanning, Home screen, and Device Management. This screen allows the user to view all available information about the selected device:
- Name: provided during initialization.
- Icon: provided during initialization.
- Domain: provided by the system administrator.
- Serial code: provided by the device itself.
- Location: provided during initialization.
- Battery status: indicates whether the battery is still in good condition.
- Unlocked/locked status: indicates the current status of the device.
- Door Monitoring: when available, indicates whether the door is open or closed during connection.
- Last operator: indicates who performed the last known operation.
- Last connection: indicates when your last connection to that device occurred.
- Last error: shows the last known anomaly.
- Firmware: indicates the device software version.
- Emergency code: sensitive information, normally hidden or protected, that can be shown and then copied.
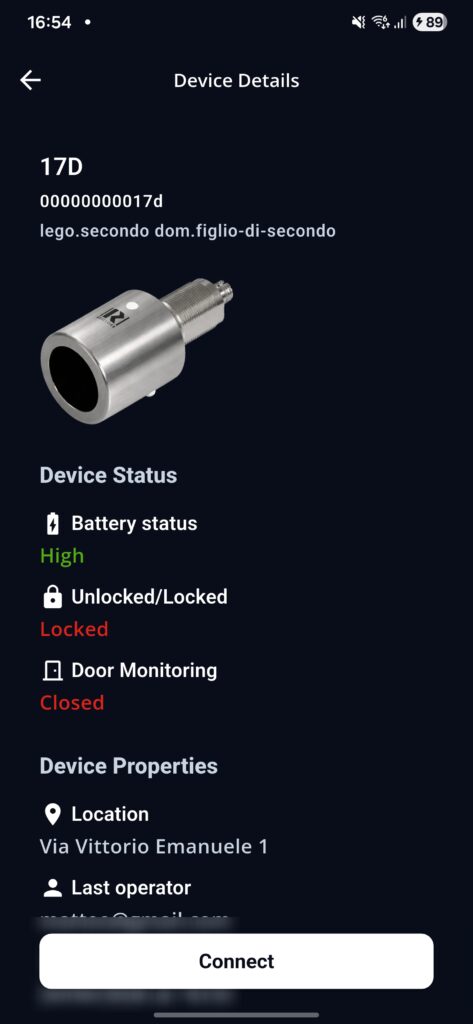
The “Connect” button located at the bottom of the screen will attempt to establish a connection with the device currently being viewed. It is possible to connect to only one device at a time.
In the case of a multiple selection, the user can scroll through the different device details by swiping sideways or by tapping the page dot corresponding to the page they want to navigate to. The top-right corner shows the current page and the number of selected devices, while the bottom section indicates the possible swipe directions through dots. The dot with a color different from the others represents the current page.
Emergency code
To make it visible or hide it, simply tap on it. Once revealed, it can be copied by pressing and holding it. A message on the screen will confirm the copy operation.
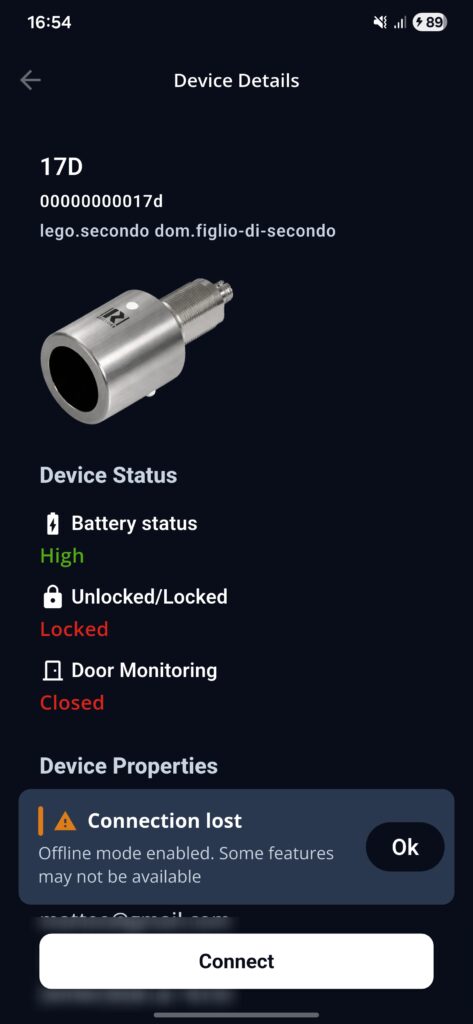
Offline Mode
Offline mode is available from the Device Detail screen and for the subsequent screens that may derive from it. In this mode, the app allows the user to connect to a device with or without an internet connection, as long as the user is near the device. At the next internet connection, the system will synchronize with the cloud.
If the user enters offline mode, they cannot leave the detail screen, update device details, or, for MASTER users connected to a device, perform a device RESET until the connection is restored.
Connecting to the device
The connection can only be made from the detail screen of a device. If the device is not detected nearby, an on-screen alert will appear during the connection phase.
During connection, a loading indicator will appear. Once completed, the operating options for the device will appear, and the operating time will begin to run. The user can operate on the device for the maximum time allowed by the administrator. If more time is needed, the administrator must be contacted. At the end of a connection, a new connection can be made with the same device.
Whenever a user connects to a device, the device will flash blue twice to notify that the connection has been established, including when a connection is resumed.
When a connection is made, the “last connection” and “last operator” fields are updated. “Last operator” will always be the actual last operator who connected to the device, while “last connection” will only indicate the last connection that the individual user had with the device.
To end a connection, simply press the back arrow in the top-left corner. A confirmation will be requested if the operating time has not expired.
During operation, error codes may be provided in case of issues. In case of problems, provide this/these code(s) to support.
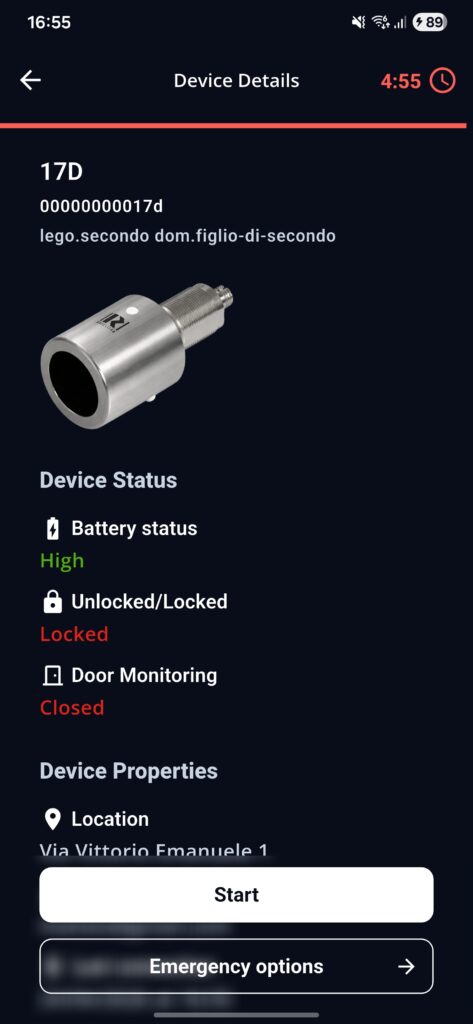
Operating options
Operating options require an active connection to a device.
Active Function:
Available for both BASIC and MASTER users. It executes the device automatic unlock and lock sequence. The sequence includes a 15-second wait between unlocking and locking the device. The operation will make the lock flash green during unlocking and red during locking. If the connection is terminated while the function is running, the device will still lock automatically after 15 seconds.
Emergency options
Emergency options are designed for cases in which the device does not work as expected and it is necessary to force a specific state or restore it to factory settings. These functions require an active connection to a device, and some also require an internet connection.
The following functions are available:
Forced unlock function: available for both BASIC and MASTER users. It performs a forced unlock of the device regardless of its current
status. The operation will make the lock flash green.
Forced lock function: available for both BASIC and MASTER users. It performs a forced lock of the device regardless of its current status. The operation will make the lock flash green.
Reset function: requires MASTER-level privileges and an internet connection. It allows the device to be restored to factory settings; the operation is irreversible. Once a device has been reset, it is removed from the system, effectively disappearing both from the selection and from the device list of all users to whom it was assigned. Depending on the result of the reset operation, the lock will flash green if successful and red if failed.
Profile and preferences
The profile is the user’s personal area. It contains user information, settings, useful links, and logout.
- Account details
In the profile/user details section, in addition to user data, it is possible to view app information such as version and build, which may be requested for support purposes.
- Preferences
Regarding user preferences, the Settings section on the main Profile screen allows the user to:
– set a language different from the system language;
– set a light or dark theme and decide whether to follow the system setting, as it does by default, or keep one of the two themes fixed.
- Useful links and logout
Finally, the last two functions are displayed: the link to the Help section and logout.
The link to the Help section can also be reached through the bottom navigation bar.

The logout modal is used to disconnect the user account from the app. Until logout is performed, the session is recovered without requiring any email or password again at the next login. When a logout operation is performed, all user preferences are restored to their default settings. Before logout is performed, a confirmation is requested.
Error codes
Error codes are organized as follows:
10.1 A01001 – A010003:
Session errors.
10.2 A020001 – A020004:
Initialization errors.
10.3 A030001 – A030003:
Reset errors.
10.4 A040001 – A040004:
Operating errors.
Conclusion and FAQ
It is recommended to include a support contact block.
Support contacts
Email: [insert support email]
Phone: [insert support phone number]
Hours: [insert availability hours]
When a user contacts support, always indicate:
- app version
- device name
- device serial number
- user role (BASIC or MASTER)
- operation that was being attempted
- online/offline status
- time of the issue
- any error code displayed
FAQ
Q: What is the difference between Devices and Device Scanning?
A: Devices shows the global list of devices assigned to the user. Device Scanning shows only the devices detected nearby at that moment.
Q: Why does a BASIC user see fewer options than a MASTER user?
A: Because Initialization and Reset are functions reserved for MASTER profiles.
Q: Who can initialize a new device?
A: Only a user with MASTER privileges.
Q: Who can perform a reset?
A: Only a MASTER user, only after connecting to the device, and only in online mode.
Q: Can I use the app offline?
A: Yes, but only if you are already in the detail screen of a device previously loaded while online.
Q: What can I do offline?
A: You can read the already loaded detail, connect to a device, and operate the device with Open/Close.
Q: What happens when the operating time expires?
A: The connection ends and you must reconnect. The timer restarts with every new connection.
Q: How do I view the emergency code? And how do I copy it?
A: It must first be made visible in the detail screen. After making it visible, simply press and hold it to copy it.
Q: What does “Last error” in the detail screen mean?
A: It indicates the last known device anomaly, for example no error, battery error, or mechanical error.
Q: Why does a device not appear in the scan?
A: Because it may not be nearby, its battery may be depleted, or, in the case of an initialized or newly initialized device, it may not have been assigned to you by the administrator.
Q: Can I initialize a device without location access?
A: Yes, this is possible, but the device position cannot be saved.
Q: Can I connect to a device without location access?
A: Yes, this is possible, but the device position cannot be updated.
Q: Where can I see the app version?
A: You can find it in “Profile > Account Details” at the bottom of the page.
Q: Can I use multiple accounts?
A: No, the app allows only one account to be used at a time. Simply log out and sign in with another account.